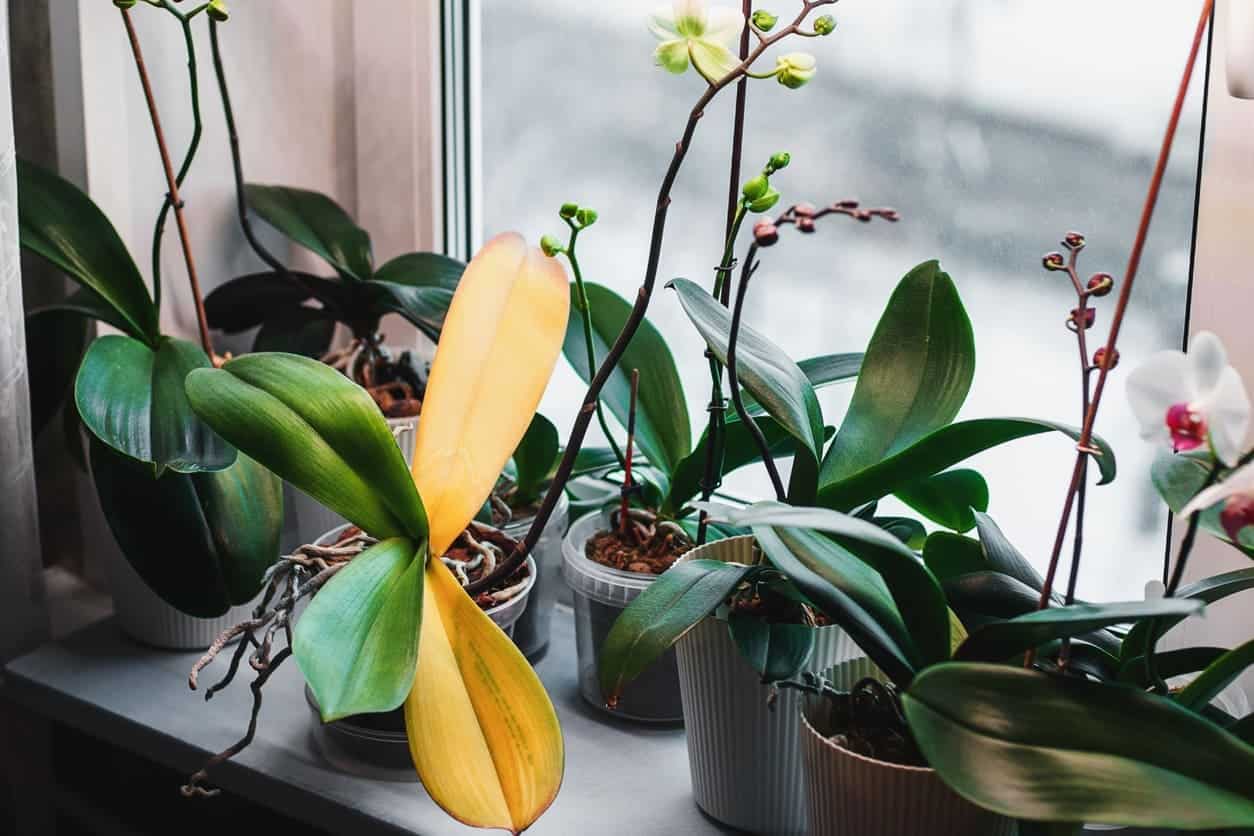
Orchid leaves turning yellow can be a big concern for any plant parent.
There are several reasons this may happen to your plant, however, the most common cause is often due to improper watering of the plant (either too much or not enough).
As most orchid species are naturally found in humid, moist environments such as tropical forests, yellowing leaves may also indicate low humidity wherever you might be keeping your plants.
Orchid leaves turning yellow might also mean:
- Too much fertilizer has been applied, causing stress and an excess of nutrients
- The plant is exposed to too much direct sunlight
- The orchid is weakened by a pest or illness
- The plant has been exposed to cold temperatures
- The plant is undergoing the natural process of shedding old foliage in order to make room for new leaves
It can be tricky to know why your orchid leaves are turning yellow and how to fix them. In this article, we will cover some of the more common reasons and how you can get your plant back to looking happy and healthy.
More: Do Orchids Grow Back?
Do yellow leaves mean too much water?
Overwatering is one of the most common causes of yellowing leaves on orchid plants.
When the orchid is watered too much and/or too frequently, the roots of the plant become soaked in water and unable to access the proper amount of oxygen needed to survive.
This impacts the ability of the plant to uptake the necessary nutrients through the roots, causing the plant to die back and leaves to turn yellow.
Overwatering your orchid is more likely to cause issues if it is combined with other improper care, such as being potted in a container without drainage holes and with soil that retains too much water, causing water to collect in the bottom of the pot and the roots to easily become over-saturated.
In addition to causing leaves to turn yellow and die, overwatering of plants can cause root rot. This further limits your plant’s ability to absorb the nutrients it needs and can be a more permanent form of damage to the plant.
To avoid this, water your orchid plants on a regular schedule, and be sure to not apply too much (or too little) water at one time.
You should also allow excess water to drain from your plant by potting it in a container with drainage holes and using proper soil or planting medium suitable for orchids.
More: Bamboo Leaves Turning Yellow
How do I fix yellow leaves on my orchid?
As mentioned before, there can be many reasons why yellow leaves start appearing on your orchid plant.
This means that it may take a few tries to figure out what the issues are, so you can properly adjust your plant care and avoid having additional yellow leaves appear.
The first thing you will want to do is to determine if the yellow leaves are due to improper care or other issues, or if it is simply part of the natural life cycle of the plant.
Like many other plant species, orchids will occasionally allow older leaves to turn yellow and die off, to make room for new, young foliage to grow.
Even a very healthy, happy plant can only maintain a certain number of leaves, which require nutrients and energy to grow and keep green.
Unfortunately, there is no easy way to tell if your orchid is stressed from something in the environment or just allowing a leaf to die off naturally.
It is best to pay some close attention to your plant if leaves start turning yellow, and to assess how you are currently taking care of the plant to be sure you aren’t doing something wrong.
Overwatering or underwatering is one of the most common causes of yellowing leaves on an orchid. To determine if this is the cause of yellow leaves on your plant, keep track of how frequently you are watering.
If it is more than once every 7 days, you may be overwatering. If you are only watering a few times a month, or not fully soaking the roots each time you water, your plant may be underwatered.
Also, check and see if the roots of your plant are regularly sitting in water. This often happens if you have potted the plant in a container that does not have drainage holes in the bottom.
Low humidity caused by a drafty window, indoor heating, or a dehumidifier in your home may be the cause of your orchids’ yellowing leaves.
As species that are found in humid environments in the wild, orchids are sensitive to a lack of moisture in the air. This is more likely to cause an issue if your plant is also underwatered.
To determine if lack of moisture is the cause of your plants’ decline, assess its location in the home, is it near a window or a heating vent? If you think low moisture may be the issue, relocate your plant to a better area, gently mist the stems and leaves every 2 days to increase the humidity around your plant, and see if these changes result in your plant recovering.
Also check: Why is My Cactus Turning Yellow?
Fertilizer is not necessary for orchids to happily grow indoors, however it may be applied to help stimulate flowering.
If you are using fertilizer, be sure to purchase an orchid-specific kind to avoid over-fertilizing your plant, which can cause stress, nutrient burns, and yellow leaves.
If you have applied too much or the incorrect kind of fertilizer to your plant and caused yellow leaves, allow the leaves to die off naturally and fall off your plant rather than remove them yourself.
Pause any fertilizing until your plant has recovered and the leaves stop turning yellow and make sure that you are watering the plant regularly.
Once your plant is healthy again, apply only an orchid-specific fertilizer following the instructions provided and watch closely for any additional negative response from your plant.
Pests are yet another reason why you may see yellow leaves developing on your orchid. If you keep your orchid close to other plants in your house, there is a higher chance of pests being passed from plant to plant.
If you are concerned that pests might be the cause, separate your orchid from other plants (ideally it will be the only plant in a room) until you determine if this is the case.
Focussing on the yellow/unhealthy parts of your orchid, check for pests or signs that pests are present. This may include:
- Yellow or brown spots on the leaves
- Fine webbing (like spider webs) on the stems of the plant
- Honeydew or other sticky residue left behind by pests
- Scars, holes, or other signs of insects feeding on affected leaves
- Presence of actual pests on and under leaves, on the stem, or within the soil
It is important to note exactly what pests or potential signs of pests are present and where they are on your plant.
Knowing the species of orchid you have can help narrow down what pests may be present as well, as different species may be impacted differently by the same pest.
When comparing your affected leaf to a healthy one, use a healthy leaf on the same plant or a healthy individual of the same orchid species for comparison, so you know what may be “abnormal”.
Keep in mind that there still may be variations between individuals that are not due to pests or other causes for concern.
Once you determine if pests are present and which pests they are, you can begin treatment. As mentioned before, you should separate your affected orchid from your other plants to ensure pests don’t spread to them as well.
Various treatments exist for different pests, but most include spraying with some type of solution, such as diluted rubbing alcohol or neem oil, to help kill the pests.
For some pests, like scale, you may want to try and physically remove the pest from the plant to speed up healing, although this can be time-consuming.
If you have checked and tried all the above things and your plant is not recovering or you still find more leaves turning yellow, there are a couple more things to consider.
If it is summertime and your plant is near a window, it might be getting too much direct sunlight during the day. Try moving your orchid to a spot with less direct sun (but that is still bright) and see if conditions improve.
Alternatively, be careful of placing your plants (especially orchids) on window sills in the winter months, where they may be exposed to cooler-than-normal temperatures due to being close to the glass.
Orchids do best in the range of about 12 – 23 degrees celsius, and any temperatures outside of this range may negatively impact the health of the plant.
Will a yellow leaf turn green again?
Even after you have taken the steps to ensure proper care for your orchid to stop more yellow leaves from occurring, it is highly unlikely that the yellow leaves already present on the plant will revert back to being green.
This is because the healthy tissues in the yellow leaves have already started to die off, and as a general rule the plant will not reverse this process and make the leaf green again.
If the leaf has only just started to turn yellow, it is possible that a fast correction of the issue will cause this to reverse and the leaf to become green again. However, most adjustments to plant care take time to become effective, and this outcome is still unlikely.
The more common outcome of a yellowing leaf is for it to continue to turn yellow, and perhaps even brown or spotted with brown depending on the cause.
As any moisture and nutrients are lost from the dying leaf, it may become wrinkled or shriveled in appearance, even while still attached to the plant.
Finally, the leaf will fully die and the plant will drop the leaf by allowing the connection to the plant to fully disconnect. This is similar to the process of deciduous trees losing their leaves every fall in temperate regions.
Should I cut the yellow leaves off an orchid?
In general, you should avoid removing leaves from your orchid unless absolutely necessary. Whenever you make a cut on a plant, you expose the internal tissues of the plant to outside pathogens, pests, and diseases.
You also remove any nutrients that are present in the leaf that is dying off.
Unless leaves are rotting or diseased and have the potential to spread into other areas of the plant, they should be left to die off naturally.
Yellowing leaves will usually gradually become more yellow over time, shrivel up, turn brown, and naturally fall off the plant.
Allowing this process to finish naturally instead of removing the leaves prematurely means the plant can properly prepare for the loss of the leaf.
How do you remove dead leaves from an orchid?
If you have decided you simply cannot wait for the dying leaf to fall off naturally and want to remove it from the plant, be sure to do it properly.
Only remove a yellow leaf if it is the only one present on the plant, and all other leaves look healthy and don’t show signs of dying off. This will reduce the chance of shocking the plant by removing too much tissue at one time.
Whenever you cut a plant and remove the protective outer layer of growth it is important to use clean, sharp tools to make your cuts.
Cuts should have smooth edges, not jagged rips or tears, to allow for quick healing of your plant after pruning or leaf removal. Cut the leaf off as close to the bottom as possible without damaging the main stem.
After removal, dispose of the leaf and do not allow it to sit and decompose on the top of the soil, as this might attract pests or other diseases to your plant.
Keep an eye on the cut over the next week or so to ensure proper healing, and look for any new growth that might indicate your plant is on the mend!
What do Overwatered orchids look like?
If you think your plant’s health may be declining due to overwatering, there are a few things you can look for to confirm this.
First of all, if your plant is in a pot with no drainage holes and in soil that is not suitable for orchids it has a good chance of suffering from overwatering.
An overwatered orchid will develop yellowing leaves due to insufficient nutrients reaching the plant from the roots which are saturated in water.
If you remove the plant from the pot to examine it, you might find that the soil is dark and wet, and the roots may be white or yellow, shriveled, and dying back. Roots with root rot caused by overwatering will turn dark brown or black and be soft and mushy.
Healthy orchid roots are green and thick in comparison. An overwatered orchid may look unhealthy overall, and would not likely flower in the way a healthy orchid would.
To prevent these issues from happening, be sure to water your orchid the proper amount and on a regular schedule to allow drying of the soil between watering sessions.
How often should orchids be watered?
Although orchids in the wild are found in moist, humid environments, they do not need to be watered excessively compared to other plants.
Exact watering needs can vary depending on the temperature of your house, how dry the air is, and the type of soil used.
In general, orchids should be thoroughly watered once a week or every 7 days during the growing season (spring and summer) and about once every 2 weeks (14 days) during the fall and winter when the growth rate is slowed.
Start by following this general schedule and be sure to check the soil dampness between waterings to narrow down exactly how often your specific plant needs water.
If the top 2 inches of soil is dry before the next scheduled watering, adjust by a few days if needed. If soil is still wet when the next watering period comes along, delay for another day or two to allow it to properly dry out.
It is also important to allow your plant to drain off excess water when watering. The soil should be fully wet to allow proper root development, if only the top few inches of soil is watered, the roots below will dry out and stop transporting nutrients to the plant.
You can water your plant by submerging the pot in a basin or sink full of water and allowing it to sit for about 10 minutes.
After you thoroughly water your plant, allow the extra water to drain off into a sink before placing your plant back where it was.
This prevents water from pooling in the bottom of the pot, which will suffocate the roots and cause root death.